A few days ago, I released an open source js library for creating modals.
Check it out now on github.
Being a front-end dev, over time I have developed my own style of coding best practices. Here are some of them.
Javascript
Before I delve any further, let me tell you that I don’t strictly follow jslint’s guidelines. The reason is that writing perfect code(according to jslint) is useful only if I and douglas crockford were programming together.
Anyways, some sample code :
;(function() {
    var list = [];

    var module = {
        init : function() {
            console.log('initialized');
        }
    }
})();
Commenting sample code :
/*
 *
 * app.js
 *
 * dependencies :
 *     mvc.js
 * 	events.js
 *
 * menu :
 *  defaults
 *  templates
 *  pages
 *  controller
 *  routes
 *
 * Code conventions :
 *
 * Partially follow jslint
 * use double quotes for strings(only if required)
 * leave a space between () and {
 * leave 6 spaces between main sections
 * leave 3 spaces between minor sections
 * leave 1 space between two functions and misc statements
 *
 * Lastly, emphasis on common sense rather than code conventions. Use jslint as a guide only.
 *
 */
The last line is very important. I place common sense and code readability over conventions. Even if it means ignoring the linter.
Oh and I use jshint. Much better and less opinionted.
Css
My overall style of writing css and improved much over the years but I still have to settle down on one definitive style of writing css code.
Some sample code :
/* -------- $sidebar -------- */
.sidebar
{
    position:absolute;
	right:100%;
	top:0;
	width:96px;
	margin-right:12px;
}

.side-links
{
	display:block;
	padding:12px;

	text-align:center;
	font-family:'dosis';
	font-size:18px;
	line-height:24px;

	cursor:pointer;
}

.side-links:hover
{
	color:#EB4749;
}
Css commenting style :
/*
    Layout css

	Menu :
		$layout
		$sidebar
		$views

*/


/* -------- $layout -------- */
html, body
{
	width:100%;
	height:100%;
}
Note the generous amount of whitespace in the file.
Final words
Not everything is perfect.The idea of laying solid code conventions is to write better usable code which is still readable after a long time.
As time goes by, the foundation I have laid keeps getting stronger.
In case you don’t know, brackets is an open source code editor sponsored by adobe.
Its main agenda is that you can(eventually) code right in the browser but right now it works as a standalone desktop app.
I first heard of brackets a couple of months ago. It had a snappy and minimalistic feel to it which felt great. However, it wasn’t polished enough so that I could ditch dreamweaver.
Now, at the 31st version, it rocks.
Brackets wut?
So its a code editor after all, no big deal. Except it has a cool extension feature where you can download extensions for it directly in brackets. Also, did I mention it has a built in web server(brackets is actually build on nodejs-webkit project)
Here is how it looks all pimped out :

In case you are wondering what that thing in the side is, its that see-your-code-from-10,000-feet feature from sublime text(its an extension actually)
My extensions
These are some of the extensions I use :
Press ctrl+f4 on a line of code to bookmark it. Press f4 to go to the next bookmark. Pretty awesome.
The only problem is that bookmarks are not persistent. Reload brackets and they are gone. Still, pretty useful for that 2000 line+ css file.
Adds small dots to whitespace so you can check if any empty spaces are left around.
Add an extra sidebar where you can see a zoomed out preview of your code. Great for coding big files. Sublime text users will have another reason to ditch their editors hehe.
All said, this code editor is gearing up to become an all in one solution for web programming. Granted, it won’t become the next eclipse or visual studio ide but what it does, it does with panache.
I have heard many people say they are going to open up a forum which will be popular and they will be cashing out from it. As naive as this sounds, this is the most popular reason for starting a blog or a forum.
First of all, a community is a place where people bound by a certain topic come together. In the interwebs, this means forums or blogs.
Certain sites are leading examples such as hacker news, coding horror, css-tricks, etc. The common point between these sites is that they weren’t meant to be a place where like minded people would gather.
So how to create one
Over the years, I have observed that its the early adopters which grow and shape a community. If these people are looked after, they will bring in many more people.
Now, if you have got a blog which just got a 100 facebook likes, it is not a community yet. And it is certainly characterized by a lot of unrelated random visitors giving likes or following you (on twitter)
So, first things first, make a place where people can give out information. To do this you need some sort of credibility. Now you see, all good hackers want to work with other good hackers. They can’t stand working in a bureaucratic nightmare like a government agency. So you need to decide which type of stuff are you good in and rope in other people.
Oh and its a bonus if you are creating a community with a couple of friends.
Eventually, your site will start acting as a public square where everyone can hand out.
Watering your community
I read a post somewhere that the tone of your community is important. That’s true. Unless you want something like reddit.
The tone of your community is important because people will start associating members of your community with your tone.
In this way, they can easily know when someone is from reddit, digg, 4chan(Ow), slashdot, etc.
Then there is the issue of admins. Like every general promoting a lieutenant, you will need to promote your loyal users to moderators, even admins. But beware that this is a tricky job. Some people can get cocky too.
But this shouldn’t be much of a problem if your would-be mods and admins are loyal to the site.
But why create one
Well, for starters, you get :
A group of like minded people together. Great especially when it is an obscured topic.
Internet fame. Probably the best reason.
Power. Lots of it. Especially when you are the commander of hundred keyboard warriors.
Enjoyment. Nothing kicks off your day better than reading a 20 page flame thread.
This is all for now. And if you can’t create one start joining one.
This is my chat log from last night : 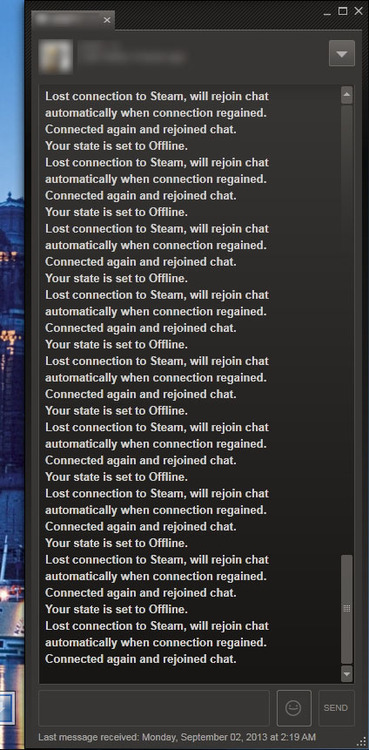
This thing sucks harder then a bag of rotten tomatoes. And that’s just me being liberal.

My workplace.
Tools
On the right is a panasonic headphone. They are pretty cool and I like their vintage aviator looks. Good for some late night gaming and coding sessions.
Then there is standard microsoft mouse. I don’t play as much games as I used to play back in the days so this mouse probably symbolizes that.
On the left is a scale on which ‘S7’ is imprinted. You can’t see from here but its there.
Then there is a nokia X1 which I still use. And an ipod 3g.
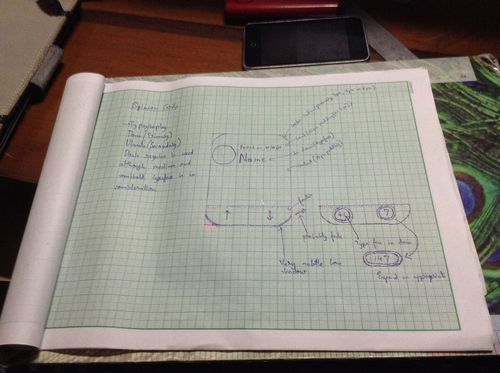
I have clipped a stack of graph pages on a board. This is where I (mainly) sketch my user interfaces.
Here is a sketch from my current project :
Then there is a razor blackwidow keyboard underneath the desk (you can see the light) and the cover of my ipad on the left.
Other than that, I have a custom build pc on the right and a shitty router on the left.
I hate to say this but in my hometown there is no decent library. Most of my time scourging through books is spent online.
Over time, I have read many quality books on programming in general. This is one list I wanted to share with you since a long time.
General
Coders at work by Peter seibel
This one is more of an interview book than an actual programming book. Peter gathers twelve of the greatest programmers of our time and shares their experience with us.
The passionate programmer by chad fowler
This book is pretty awesome. Chad fowler tells us this share of experience in the IT industry.
The nature of code by Daniel shiffman
Available for free, this book starts of with simple game physics 101. Before you know, Daniel shuffles off into hardcore territory by explaining genetic algorithms, neural networks and the like. Best of all, it comes with lots of code example, all done with processingjs so you can see it in the browser.
Management
Getting real by 37signals
Steve jobs would have loved this book. The ideas contained in this book may seem a bit radical but they are all practical and useful nonetheless.
This book is available for free.
Rework by 37signals
This books is essentially an extension to Getting real but with more panache.
The 10 day MBA by Steven silbiger
I have heard that many wannabe entrepreneurs are recommended this book. Whether you are involved business or not, this one is a great read.
Programming books
The art of programming language by Donald knuth
This is the holy bible of all great programmers. It contains lots of hardcore algorithms which may confuse all but the most passionate programmer.
And speaking of which, this book is big. In fact, it is so big that they had to divide it into a group of smaller(but still big) books.
Why’s poignant guide to ruby by Why
I will be frank here, I don’t really like ruby that much. But what makes this book different is that Why(he is really mysterious) made it with so much passion that it feels that sometimes a mad man is teaching you to program using a series of cartoon stripes(but in a good way)
This book is available for free.
Javascript books
Because most of my work is on javascript, I will recommend some good js books.
Javascipt: the good parts by Douglas crockford
Written by javascript’s leading authority, this books teaches some pretty cool tricks and tells us how to write better code.
Javascript design patterns by Addy osmani
This book is probably the best reference book on js. Not for beginners, this book contains lots of design patterns along with great code examples.
Best of all, this book is available for free.
That’s all for now folks.
My vacations are nearly over and college will start from 1st july.
As in all my vacations, this time I am making a webapp which is a cross between forums and instant messanging.
This is how it currently looks in ipad mini :
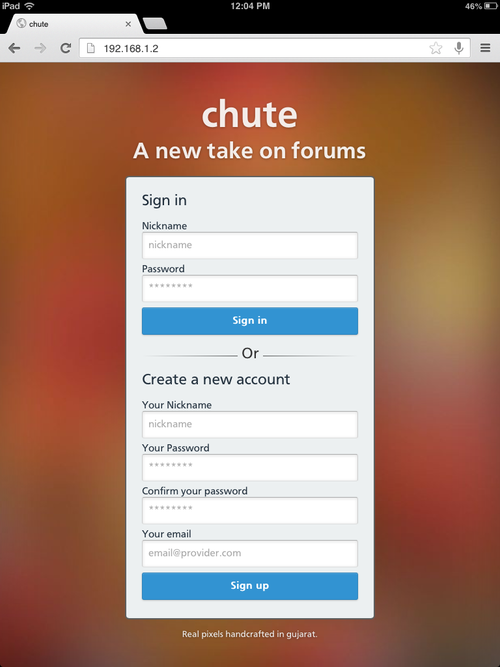
This is a bigass project and it may take a couple of months to complete.
But the login page is a nice start.
Its been a long time since I have updated this blog. Exams, work and other stuff have been taking my spare time away from me.
Me!
College
Exams are over and I am going out for my vacation. Thank god about that.
Work
I am making a map for cs 1.6
The color palette of this map is red/rusty red with white highlights. It looks pretty cool with its industrial style.
Other than that, I am working on a webapp on nodejs again. Its supposed to be a cross of forums and chat groups. Essentially, public chat groups.
Debate
The future of web apps
I honestly believe mozilla is going to lead the future of web apps. A future where you will only download the required files to be able to run apps, games, etc on your browsers. And as browsers get faster, webapps will get bigger and better.
The only problem which is my personal opinion is that this is going to take a lot of time, possibly four years for webapps to go mainsteam.
And also on the success rate of firefox os.
ios7
The buck won’t stop here. I know apple redesigned their mobile interface and every well known designer is screaming blood. But they need time to adjust their ui/ux. Give them a couple of months and they will polish their interface.
Skeuomorphism vs flat
This is not actually a debate. There was never any rivalry between the two groups. Both have their advantages.
Its just that in this digital age where screen size is precious, people are ditching skeuomorphism in favor of flat design. But flat design is harder to make because you need to double the amount of work to guide the user.
Oh well, just when box shadow and radial gradient was getting compatible ….
College education sucks?
Well it does
Read on.
Class test
So I was giving a test online on java when a question popped up like this:
- System.out.print(“finally”);
What will it print?
Options:
- “Final”
- Shows up compile error
- Runs successfully
My reaction : Dafuq!?
So I called the faculty to ask what the question means. She said it won’t print and exit because the you didn’t put that statement inside the main function.
I seriously wanted to bang my head on the desk that day.
Some people
At college, I help out quite a lot of people. Now, during our innovative assignment week, everyone had to make a simple login system.
They asked me from where to download templates. I told them html templates suck but they should try building sites from frameworks like bootstrap or zend.
A few days later, my friend asks me to help out with his code. And he shows me this:
Also, later on
Keep in mind that all a tags in all the html pages were made like this.
AARRGGG.